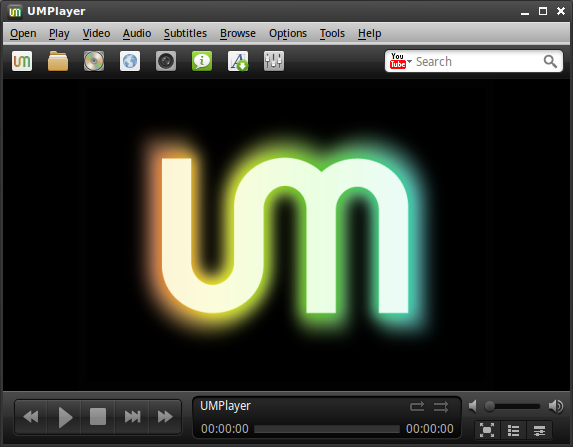
Among the highly interesting activities that you could do with your media player aside from playing and watching media files is changing the skins from time to time. It makes your media player experience more fun if you’ll be able to match the themes on the series of actions that you are applying with your UMPlayer. It is pleasing to your senses if you can make your media player colorful and lively while exploring all its menu and function.
With UMPlayer you are not simply downloading skins to complete your collection of themes and preferences; instead, you can create your own style and blends too. Then when you’re done making skins, you are now ready to apply them to your media player. It’s easy to learn how to change skins in UMPlayer, even beginners can perfect it easily. If you’re now ready go ahead and take these steps and enjoy your UMPlayer the beautiful way.
How to Change Skins in UMPlayer ?
1. Choose a Skin Template
To ensure that you have plenty of skin choices for UMPlayer, you need to save as much of it on your preferred drive. Creating your skin is the best option to complete all your needs for the skin. After you create a skin you can even share it with your friends. The first thing that you need to do is to choose a skin template. Then you need to review the sub-directory of the skin containing the files.
Often, you’ll encounter CSS definition files that are used for the font and background colors and the PNG elements which are used to paint the different types of UI components. Now that you have checked the files under your selected template, you are ready to take the next step on how to change skins in UMPlayer.
.
2. Making an Image Source
Creating an image resource is also essential in creating your own skin, which you’ll eventually install on your media player. Overall, there are almost 39 variants of images that you need to create and crop for you to finally produce new skin. The image resource is important for you to eventually make your mockup and new images used to color the UI.
Making an image resource is commonly perfected by the trial and error method. Included with the creation of the image source are the button elements that require 4 different images that are vertically aligned.
3. Testing a Skin
The next step that you need to fulfill on how to change skins in UMPlayer is the testing process. This stage is important because you already have to make a new sub-directory in the themes of the sub-directory from the UMPlayer installation directory. Then you need to label this directory not with the default installation directory name anymore rather with your new skin’s name.
Afterward, you need to copy all the skin files to the new sub-directory so that you can start to restart your UMPlayer right away. After you have restarted your UMPlayer, you’ll need to check the list of skins under the context menu because your new skin has to appear on the list this time.
4. Installing Skin
You are now getting closer to eventually fulfill your task on how to change skins in UMPlayer. Apart from creating your skin, you may also the skins of your choice and install them on the UMPlayer directory. If you’re downloaded skin file comes in the RAR archive, you just need to unpack it quickly and then place the file contents in the install directory under your themes directory. If you wish to check or select the new skin, restarting your UMPlayer first is recommended. Then, simply go to options, under it you’ll see skins and then select your preferred skin name.
5. Changing Skin
Finally, you reaped your effort in creating beautiful skins. It’s time you apply your expertise on how to change skins in UMPlayer. You have now lots of beautiful options to choose from. You can still select from the list of default UMPlayer skins like Modern Skin, Mac Skin, Vista Skin, Black Skin, and Gonzo Skin.
But of course, it’s totally fulfilling to see your own creation welcomes you each time you open your UMPlayer. Go ahead and flaunt the beauty of the skin that you have created. On the uppermost part of your UMPlayer, you’ll see the series of Menus. Next, you’ll have to click the options button and it will display lists of commands.
Thirdly, you’ll just have to hover your mouse on the skins option or click it once to display the list of skins available in UMPlayer. Lastly, click your desired skin or you may click the option to get more skin if you want. Now, you can perform the same process all over again to change your UMPlayer skins limitlessly.
Wonderful Process in Changing Skins
Changing UMPlayer is fast and exciting. It doesn’t involve any complex process at all. Thus, you’ll appreciate performing the entire process on how to change skins in UMPlayer, if you happen to create your own skin. Not only that you made your own media player attractive but at the same time you learn a lot on your own, which you can use to further magnify the overall quality of UMPlayer.


